Showing posts with label DIY. Show all posts

3.05.2012

I ♥ DIY


I made these felt heart for the bird's room a while back...and I never got around to actually hanging them up.
Of course, as soon as Luca saw them he wanted one of his very own.
So I thought it would be a great time to do a little tutorial for all of you as well!

***

I realize that there are probably a million and one ways to do this little project and it's probably swirling all 
over the internet, but one more can't hurt right? Plus, if you don't like my way of doing things...there are plenty of other resources to fall back on (win-win right?!). 


...and also batting (or some form of stuffing) which I failed to picture because I'm awesome lol.


Viola!
Simple, easy and pretty cute! That's the kind of projects I like!

Have any of you made a similar project? 
I would love to see it!
Leave a little link directing me to your
version ( or any other diy...I'm not picky lol)
and I'll check it out... 
If several of you link up, I can even
do a little post highlighting each of your projects!!!

Hope you all had a great weekend!!!
The wind is really moving today
so we have stayed indoors mostly.

Happy DIY-ing! 


1.06.2012

Chic Manhattan Home: DIY for the Masses


I was catching up on some blog reading tonight...and happened on this refinery 29 article on fellow
blogger ...and mom, Joanna Goddard's, Manhattan home. The article is one in a series of other Home DIY sneak-peaks, and shows just how easy and fun it can be to recreate, rework and revamp old, inexpensive and functional pieces into any home.

I loved the article and the photos of her room are chic, minimal and fun! If you want to check out the article follow the link to refinery 29's page. Check out Joanna's blog, A CUP OF JO, too... I'm sure you'll love it as much as I do!

ps...how adorable is that little bebe?
goodness.gracious.

Night, night friends!

pps. the pic above is via refinery 29... (see above link)


12.09.2011

DIY: Photo Canvas Wall Art


I just finished this awesome project a couple days ago, and I am so beyond pleased with how well
it turned out! I knew as soon as I finished it, that I was going to have to do a DIY post for you all...even though I know there are several out there circling the blogosphere.

Those of you who know me personally, know that I have had this stick on my wall in not one, but two houses for the past oh, 5 months or so. Hahaha...I had this idea to hang pictures, art pieces, etc. from it...and it came all the way from the NC mountains (thanks to the Mr. grandparents!!!) to come and live with us ;)

Well, we got it on the wall...and then nothing happened...time passed and we moved...
and the stick came with lol... I had good intentions...but I could never find either the right frames, pictures I wanted, art wah, wah, wahhhhh.... you get the idea.

Until a few days ago.

I had been seeing a lot of people on pinterest trying different photo projects...
and I happened onto this one in particular ( I saw several more after too) ...
and I said to myself, " dude, that looks so easy..."  at least something to that effect
anyway.... I'm sure the "dude" was in there somewhere...it usually always is haha.

So I ran, hop and skipped over to the craft store...and did the momma
run-around... with my two kiddos and those ever-too-small craft store carts...that leaves no run to
actually wheel around your supplies hhaaaaahhhhh....
I digress.

Well, everything I needed ( which was the canvas and the ribbon, I had everything else)
was on sale...like 60% off sale...all my artsy people let me get a "yayahhhhh"

sooooo... I got out of there pretty cheap to say the least...minus a few less brain cells...
Luca alwaysssssssss has to go potty at the craft store....after my cart has stuff in it
....and I can't wheel it into the bathroom...because, yeah, they will arrest me...
 see the problem here?!?!

THEN....

I electronically uploaded some pictures of  us and other random pictures I have taken here and there and sent them to print at Walgreen's with a coupon
for around 30ish% off.... ( I loveeee it!!!!) and picked 'em up about 45 minutes later.
super easy to do by the way...and I totally recommend it for moms out there...makes picture printing so much easier!

Now, for the "How To" part...


Step 1: Paint a light coat of mod podge over your canvas completely covering it.

Step 2: Coat the back of your picture with mod podge as well, it won't harm the paper...
( make sure you have trimmed the picture to make sure there is no over hang on all sides
of the canvas before you coat with glue)

Step 3: Place the picture on the canvas, positioning it exactly where you want it to dry.Rub in any bubbles or touch up any areas that didn't get glue...namely the corners. Let dry for about 20 minutes or so.

Step 4: Once the glue is dry, cover the top of the pictures ( YES, I said that correctly) ...The glue will
go on a whitish color, but dries clear. Make sure to get the entire surface. Again, let dry.

Step 5: Making sure everything is dry, take a basic (dry) sponge ( not pictured, shoot me) and dab it into your paint, ( I used black, you could use any color really, but you get that nice aged, burnished look with the black) stippling it onto the sides of your canvas and lightly brush it over the corners and very edge of the picture all the way around. Try not to leave globs of paint on the sides unless that's of course the look  you are going for.

Step 6: Prepare your hanging materials...I used 5/8" wide ribbon, but you could use a wealth of different things, such as, twine, burlap, small rope or you could use a thicker ribbon....and  you could even hang it with just a finishing nail...the options are truly endless.

drum rollllllll please!


Viola!

Did I mention that I love, love, love how it turned out!?!?!

If you have any questions, or if I wasn't too clear on something just shoot me a message! I'll be happy to help any way I can.

I would also love to see your finshed product if you decide to try this out yourself!

Happy DIYing friends....!

10.22.2011

DIY: Picture Project

Luca loves to have pictures all over his room...even before we moved into the new house. I absolutely don't mind so I encourage his creativity any way I can.

When I was trying to decide what to hang on his walls ( I am almost ready for the reveal by the way) I wanted to try something fun and creative...outside of the ordinary frame. I had a couple of these weave baskets given to me by the Mr.'s grandmother and wanted to find a way to use them... perfect solution!

 here's the finished product


This was a super easy project! All you need to do is spray paint the basket ( if you so desire) string the wire ( I used thin jewelry wire) or fishing line through the holes in the basket securing them on each side with a tight knot. Then I took my Instax-mini photos that I selected and paper-clipped them to the wire. That's all! The only other thing you need to do is tack the basket onto the wall...you can do this with a small finishing/hanging nail or even a tack ( depending on the thickness of your basket).

I love how it turned out...and I love that I could create a fun way to display pics with things I had lying around the house...I spent $0 on this project ( I already had the spray paint and everything).

What are some fun ways you have either displayed or seen pictures displayed?

fortheloveofblogs

10.12.2011

DIY: Pin It Down....literally

Hello everyone! I am back! I have been out and about the last couple of days with the Mr.'s parents in town, and that's why I have been so silent here on the blog. I did get a chance to read all of your very, very sweet comments on my last post...and want you all to know how wonderfully sweet you all are! My-oh-my you gals sure do know how to make my day! I told Luca he was a big hit on the blog...and he seemed quite pleased ( wink wink....he's a ham...and I love it!)  Kids are amazing...and I am glad so many agree that we should be our children's sounding boards...their #1 cheerleaders. If they don't get it from us...who will they hear it from?

Anyway....I wanted to share my super easy and awesome DIY with you all that I promised last week...! In my office/library room...I wanted to spruce up the top a bit with something but couldn't figure out just what I wanted...Well, after a trip to the local Habitat Restore ( right down the road woo hoo) I found a frame and thought hmmmm...I could use this but how?!?! The frame cost a whopping $2 so I grabbed  it up with the notion to figure out a project for it later...After thinking about it, I decided I wanted to use it as some sort of pin board...and seeing a lot of different types from Pinterest, I knew it wouldn't be a difficult project to accomplish. I had a bunch of fat quarter materials left over from another project so I checked to see if the size would work with the frame...and it did...almost to a T!!!

Problem #1
I had no cork board or backing....and not wanting to run to the craft shop I started rummaging around in my craft supplies...no luck, so I headed to my last resort...the dum,dum, dum....garage.
Eureka! I had a whole stack of cardboard boxes...so I thought, hmmm maybe this will work?! I was afraid that it would hold pins or much weight but after a few test punctures...it actually did work! So, I cut a length of cardboard to size, place the fabric over it and stapled the sides to the cardboard. Then I tacked the sides of the cardboard to the back of the frame....and....

Viola!


Materials
* frame of some sort - can be any size and can easily be thrifted
* material - enough to cover the entire backing of your board
*cork board/cardboard- cut to size ( or any other material that can hold a pin and weight)
* staples- for tacking the fabric to the board
* thumb tacks/finishing nails/industrial staples- to secure the board to the frame

I still have to touch up the frame itself a bit...I want to fill the edges/corners of the frame so it looks a tad more seamless and then touch it up with a little more white paint just to keep it clean looking.


The perfect addition to a shelf top! I love how the bright plum color highlights the dark wood of the elephant bookends ( a college graduation gift from the Mr. way back when...yep we go back that far lol).

So whataya think!?!?!

What crafty things have you been up to already this week?!?!


9.19.2011

The First of Many: I did it myself...

Well hello there lovelies! How are you all enjoying this wonderful mild weather!?!?! We are totally making use of our screened in porch area and using it for everything you could think of... meals, reading, coffee breaks... I-need-to-scream-into-a-pillow-before-I-lose-my-mind areas..you know- the usual stuff. :)

Anyway, I decided to start this week off right- as in, start ticking off the items I have accumulated on my mental "I need to get done" list. This diy was super simple and a perfect starter project for the faint diy-er at heart ... or if you just want to kick things off with an easy project...this is the one ya wanna do! When we bought the house we knew we didn't really like the gold door handles on all the doors in the house... yep, every single one was gold. Now, there is nothing wrong with a gold door knob, mind you, but the Mr. and I tend to gravitate toward darker finishes so we really wanted to carry that over into well, the door knobs. Only problem is, I am a cheapo and I hate to see a perfectly good anything get tossed out just because it's out- dated....so hmmmmm, what to do?!?!? Well, I decided to dig around the internet for some ideas...and whataya know!?!?! I found this lovely blog and a diy that was similar to what I wanted to accomplish. Armed with at least the assurance that it could be done, I headed over to the hardware store and literally sat in the spray paint aisle for a decade... the workers gradually got older every time they came back to check on me lol... I just really wanted to get it right, and get the look I wanted and I just really hate doing things twice... like my dad always says, " measure twice, cut once." (you carpenters out there will appreciate that).

I finally decided on this heavenly can of Rust- Oleum Metallic in Oil Rubbed Bronze and
hoped it would give me the look I was hoping for...

...and boy did it work! I am so happy with the results! I will say though, that because the handle is an odd shape you really need to figure out how you are going to secure it while spraying...because you want an even coat, no drippy marks and good coverage...I found that staking the back part into the ground was the best, because the newspaper I used on the first coat ended up sticking to the wet paint...and wouldn't come off without taking the paint with it. In all, it took 2 1/2 good coats, thought I would imagine if I had staked it down like I did with the second coat it may have only need 1 1/2 coats...
( this was taken right after I sprayed it...the paint is still wet, but you really can't tell!)
here's a before and after shot! Whataya think huh?!?! Not bad for $5 and change...! Best part is...all these handles got a second life out of the deal... and I didn't have to spend a ton to replace them all!

ps... I realize that the handle looks different...I forgot to take a before shot so I just snapped a pic of another handle in the house...they are all the same gold color so don't shoot me!!! lol...

even better part is... this only took like 10 minutes to do...if you don't count dry time...which was 1 hour per coat....


what projects have you all been working on lately? Any recommendations you have that I may want to add to my list, feel free to send my way! I would love to see pics/links to your projects as well!!

Happy Monday and Happy Crafting!!!

Photobucket

8.23.2011

Boot-ies to Boot: A DIY

Man, we are already 2 days into the week?! Sheesh! We are gearing up for a pretty crazy weekend needless to say with the hurricane coming nearly straight for us ...thanks Irene! ... Our families in NC reported feeling the aftershocks of the East Coast earthquake earlier today (5.8/9 yikes!) and we are thankful that all are safe and well! Such a crazy thing! I guess I have never thought twice about earthquakes, being on the east coast my whole life (although some people growing up, I remember mentioning they had witnessed small tremors), but this jolts, at least me, back to reality!A huge reminder of the time we are living in and what the bigger picture truly is. Deep stuff.

Anyway....on to lighter things!

Remember that little sewing project I was working on when we all had the sickies? Well, I finished it yesterday-ish... more like today ( I finished up the last snap on one shoe)...

little shoes for the little bird.

I love how they turned out!
I have made baby shoes before but, believe it or not, never for one of my own kids...go figure.
So since the little man has such, ahem, chunky little feet, (it is super hard to find shoes that fit his feet width-wise...not so much length-wise...just like his big brother gah...) I decided to make him a pair knowing that I could alter the dimensions to fit him specifically. I used this pattern from Shwin&Shwin as a guideline, though, when it was all said and done, I could only use the template and had to improvise the rest...I don't mean to say its a bad tutorial...quite the contrary- I recommend it, but for my birdie's foot I had to do a lot of improvising!
 For the shoes, I wanted a lightweight, breathable material since it will still be warm for a little while, I also wanted a material that would mold to his foot and not the other way around...the best for learning walkers because many times baby shoes that you buy from the store do more harm by constricting the foot than good...also many little ones have a harder time walking in those shoes than handmade ones. These little shoes are very natural...almost like he is wearing no shoes at all...but it allows his feet to stay safely away from dirt and germs...
Ok...that was a bit of a ramble...the whole  point of the before paragraph was to say...I made these little shoes out of one of the Mr.'s old shirts that he put into my reuse bin...( we do this at our house...when we out-use, outgrow, or out-love an item, clothing etc...we put it into the reuse bin or basket...and at some point or another I figure out something else to make with said items...like these shoes) so these shoes cost me...yep, you guessed it $0!!! That would be zip, zero, nada....and I don't have to worry about those fussy old store-bought shoes that he can't stand on his feet...and takes off  2.5 seconds after they are put on...these he wore all day...and never took them off once!


...see those little chunks?!?! I love em...even if they are hard to fit!

Have you guys been crafting lately? I'd love to see! Leave me a message with a link to your latest creation!


Photobucket

5.16.2011

Making things happen: A DIY kinda day....

Hello all my favorites ♥
What a day it has been, right?!? Well, over here it sure has! I was super motivated today...I woke up especially early, got the birdie to the doctor for a check up (which he handled quite well, I might add), took the kiddos to the craft store (again lol) and we treated ourselves to a little brunch....all before nap time...

Booyah

I took that designated nap time to whip together several diy projects that have been on my list for extremely too long...if you know what I mean.... Here is one I finished up today. Well, in all honesty, I finished it yesterday, but didn't get the proper hooks for hanging until today...hence the picture and the thing actually hanging lol.


I am really pleased with how well it turned out...this is my first (gasp) wreath experience to speak of so, for what its worth, I am really pleased.... I have a few special people in mind for a couple more, but you'll have to wait for completion to see those! Speaking of the actual making part, the Mr. asked me where I "got all those sticks?" to make the wreath ahahaha..."well I went into the woods..." no really, I got it from Michael's on sale and with a coupon (oh yeah) it was super cheap-o! I am thinking of making some and putting them in the shop too! I love it when a plan comes together!

I did finish a couple other projects and started one more but I will wait to share those another time!

What diy's have you all been working on/ completed recently? I would love to see!


4.29.2011

Paint Party

The other day, I had the bright idea to take the kiddos shopping for art supplies... now, we aren't strangers to art over here haha but it had been a little while since our last project- probably the first full-on paint-and-paint brush project we have had in the new house (ok I admit, I was nervous to paint in this house even if it is very easy to clean up...). I loaded up the kids and headed to the local Michael's because, hellllooooo.... I had a coupon! Yep, 50% off purchase....say no more!
So we gathered all the little supplies that we needed.... I had to restock some paint, get a some things for another project I'm working on and such. Oh, and get a canvas for the painting I finally was able to get around to painting for Luca (which was kind of my motivation for an art day).
I try really hard to be fair with my kiddos...so if I make something for the birdie man then I will try to make something for Luca as well and so on.... Well, so the last painting I did (I think haha)
 was  this little owl for Canaan's nursery. I finished it when I was still pregnant with him and before we moved into the "prairie house" (the house we just moved out of).
The short of it is...I owed Luca a painting...

so we got to it!


...he wanted to use "a lot" of colors....pleasssseeee!

...I was actually surprised at how precise he tried to paint this little bird house...he had to paint every piece of it...which I thought was awesome!


...working hard....


...his finished...well drying...product lol!!!


....and here is the project for Luca's room finally finished! He loves trains so much....especially Thomas...so I used that as a bit of inspiration and then just went with it! I like how it turned out...and he is in love with it too! He asked me every 5 minutes, "is it dry yet?"

All aboard the Luca train! hah


4.20.2011

Take notes.... or scribble


Hey sweets! It. is. Wednesday. Isn't it? Sorry I feel like I went to sleep on Sunday night...and woke up and it was not. Monday? never mind. hah.

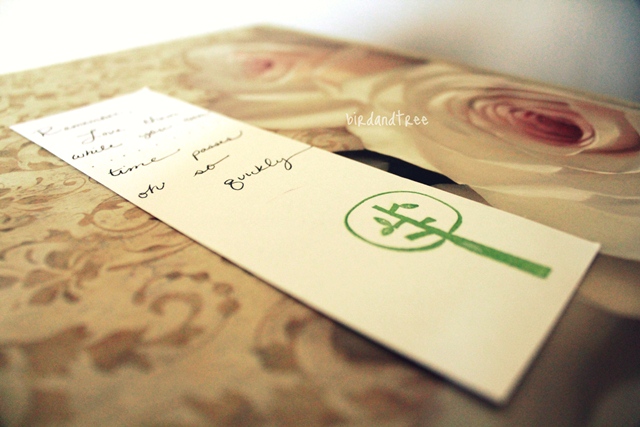
See that big in-your-face picture above?!?! Well, that was one of my latest projects...pre-move that is...so like, February-ish.... Though I have only showed it to a couple people, family mostly, I realized that with the move and everything I hadn't had a chance to do what I wanted with them....which is to find out what you think. Why? Because you lovely people have opinions, and awesome ones at that! I made these with the intention of laminating them to use as bookmarks....but as time went on I have used them for lists, note taking (like I did above) and such.... Maybe I could make a little of both?!?!
Let me know your thoughts/suggestions...they really do mean the world and are so helpful.

If I am going to be honest.
This year got off track very early on...and yes, I know it is only April (maybe there is still hope for redeeming the rest of the year!). With the death of my grandmother, who was one of the closest people to me, I kind of lost all inspiration, desire... I kind of let emotions sweep all my other loves (well not really family but ya know the artsy stuff) in life under the rug. I just haven't been myself. Then the move happened last month. What a whirlwind that was! Over the last couple of weeks though I have felt more myself than I have since all that stuff happened. Plus, I was looking back at some of my old posts and they inspired me all over again. I also have been praying/searching for purpose and I think God has been granting me little doses of just what that looks like...right when I need it.

I have said all that to say, I think I am back... I am ready?...no, willing to letting the creativity come...even though I understand that creativity and emotions for us more artistic people work hand-in-hand....and that this may open up myself to a lot of feelings I have been keeping locked up. I need a little evaluation of a project (hence the one above) to kind of direct me to where I want to go...this is a prototype I guess you could say...so your feedback is greatly appreciated.

Oh and feel free to rip me about not putting the FL pics up yet haha...I deserve it, and promise to get to it soon!!! 

3.29.2011

Matters into my own hands...

remember that little problem I was having last week? ...I was trying to find a particular plastic bag holder that I could live with.... well, I couldn't. Soooooo.... I made my own! Oh, ps my fellow, and cute-as-a-button, blogger nailanicole helped me out and told me they are actually called "sacsocks" which I didn't know and totally helped out my search! (SO thanks girl!!!!).

It was super easy too! It literally only took about 15 minutes to make (add 20 for the stenciling but that is optional).
Guess how much it cost?!?!

That's right...... $0.
Zip, Nada, Zilch!

Check it out!


Now granted, it isn't the "cutest" thing I have ever seen, but I really just wanted something simple...after all it is just holding plastic bags. So I had an old pillowcase laying around in my scrap pile and decided to put it into good use. I folded over the seam (the one at the opening) and sewed it creating a loop for my ribbon (the one at the bottom) and then sewed the side and top. Viola! Add in a little hanging ribbon at the top...and then I used freezer paper to transfer on the words! I love it when a (ahem... free) plan comes together!!!!

Even better I feel like it has really jump-started my enthusiasm to make more things for this new place we call "home". I have several projects coming so keep checking back.
I would love to see what you all are making too...so if you have recently made something link up in the comments so I can check it out! I can even spotlight one of your projects if enough of you link in!

Well, here's to another day! Hope your Tuesday was wonderful. Be back tomorrow for a cute little post I'm working on!

3.18.2011

Lets Make Something


Hello lovelies!

Hope you are enjoying the beginning of your weekends!

I was stumbling a bit tonight (on StumbleUpon that is) and came across this tutorial you all might like!
I have seen it before and attempted a tiny one when I was a teen ( that turned out super cute) and so when I saw it I thought how fun it might be to try it again...but maybe a bigger one? Whataya think?!? Especially since I still have lots of dcorating plans and ideas swarming in my head at the moment lol! ALL the pictures I got off of the Ruffled site...and they are super cute no?!?!


I just love diy's !!!! Head on over to the site (I provided the direct link above) and check it out! If you try it, link backso I can check it oul also! When I do get around to it, I will shouw you all some pictures of the finished product!

Tomorrow we are heading out to explore the area a bit! I am so super excited and prepping my camera as we speak lol! SO be prepared for a post heavy with images!


1.24.2011

My Instax thank me....


I know I gave you all a little photo re-cap of some of my weekend, but what I didn't show you was what I have been up to "creatively" speaking....well, kind of.

Since I got my Instax camera I have been trying to come up with a creative way to display all my pics....I have seen a lot of different ideas on the web, like the instax "clothes line" etc., but I wanted to go a little more creative than that. SOoooo, the Mr. had this old busted up dart board that was literally in pieces, and I happened to notice that the numbers (for the dart board) were all attached to this really cool hoop...almost looked like an oversized clock with way too many numbers and no arms....and it hit me! I could sooo use this to display my Instax pics!

All I did was attach the pics to each number using some adhesive....then I hung the whole thing on the and I used some really lovely gold floss thread that I had in my stash for the center picture.....(recognize it from anywhere lol) and viola! I love it...and it is the exact feel I was going for ♥ Don't you just love it when a plan comes together?!?!


Hope you are all having a great Monday so far! I am so excited to be having a cousin date with my sweet cuzo Summer tomorrow! I am sure there will be some pics to follow!

XoXo

 
Posted by Picasa